First things first! You want to find out what you can do with RISER and how to do it?
Here’s everything you need to know:
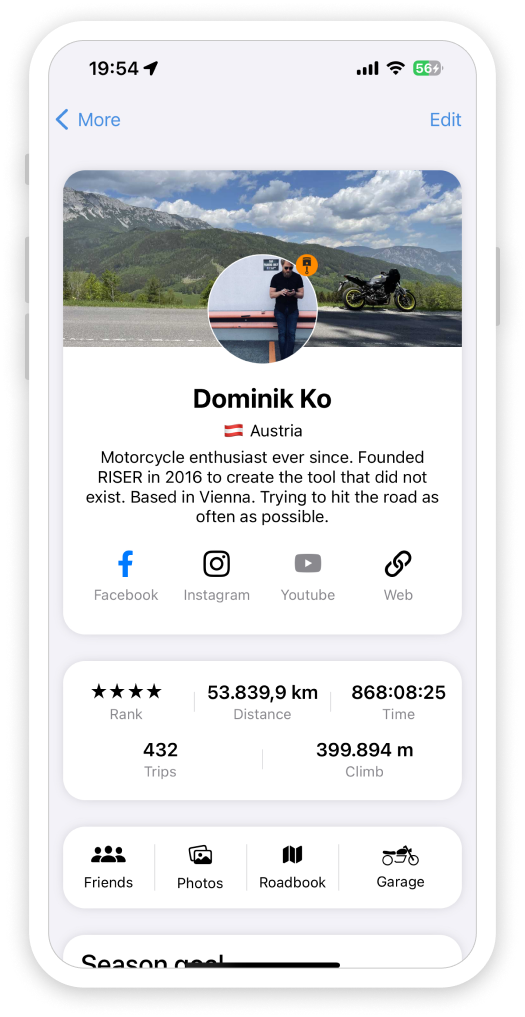
1. Create a profile
On RISER, every rider has a profile where you can see their trips, bikes, rank, total tracked distance, a profile photo and many more. When you sign up, you can add a photo, some information about you, add your bikes to your garage, set your season goal and your home country.
2. Add your bikes
In your personal profile, you can add one or more motorcycles to your garage. You can then assign the bikes to the trips you did and select your preferred bike at the end of every new ride.
To add a bike, click on the go screen on the garage icon or go to your profile (click “More” on the menu and go to “My profile”) and tap on garage.
Then click on the + symbol to add your bike and expand your garage. You will be able to see an overview of all trips and tracked kilometers per bike plus comments from your RISER friends on your bike.
If you can’t find a specific motorcycle in the list, please add it as a suggestion or get in touch with us directly via support@riserapp.com.
3. Get inspired: Newsfeed & interacting with others
If you want to get inspired by other motorcyclists or if you’d like to get in touch and interact with others, the Feed and the Friends area are the places for you on RISER.
Feed:
The feed is where you can view trips from your friends or the RISER team, check out your own trips and see if someone has liked or commented on them. You’ll also find updates about your season goal, upcoming achievements, discover newly added bikes, and see posts from both yourself and your friends. Additionally, any new publications from RISER in the RISER journal can be found here as well. Follow the activities of others for inspiration on your next ride, engage by liking and commenting on trips, and connect with riders from around the world!
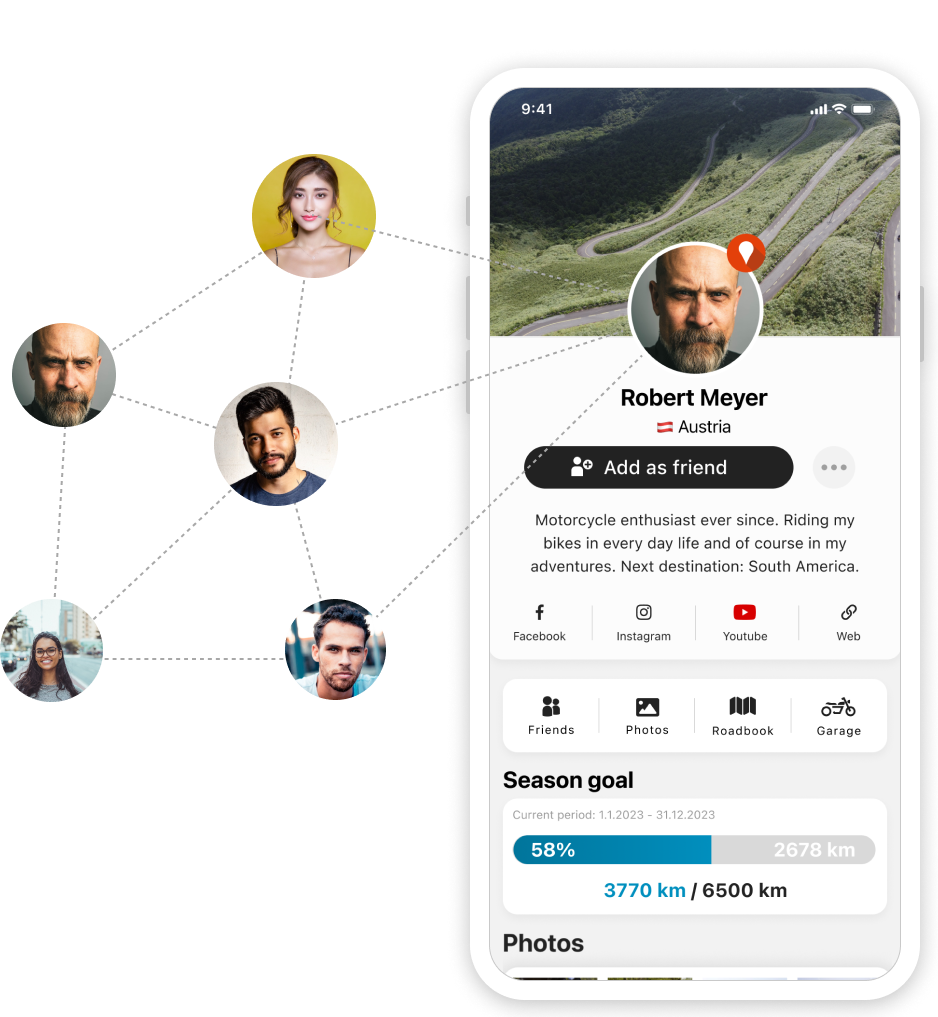
Friends:
RISER will also make friend suggestions to you and integrate them in the newsfeed. Of course you can also manually add friends. You can find the function in the “more” area on the main tab bar.
4. Groups
You can find the Groups by clicking on “More” and then choosing “Groups”. There you can either browse Groups in your area or create a new Group that you can set to public, closed or secret. In a group, you can see the trips of all group members. If you are creating a group, you will be the admin of the group. There are three privacy settings of a group:
- Public:
A public group can be found and joined by any registered RISER user. No request needs to be sent to the admin to join a public group. Every group member can also share this group. - Closed:
Every RISER user can find this group. Requesting access and approval from the admin of a closed group is necessary to join. - Secret:
Only members and invited users can find or see the secret group and its details. Users can only join if they were invited by the admin. The group is invisible to non-group members.
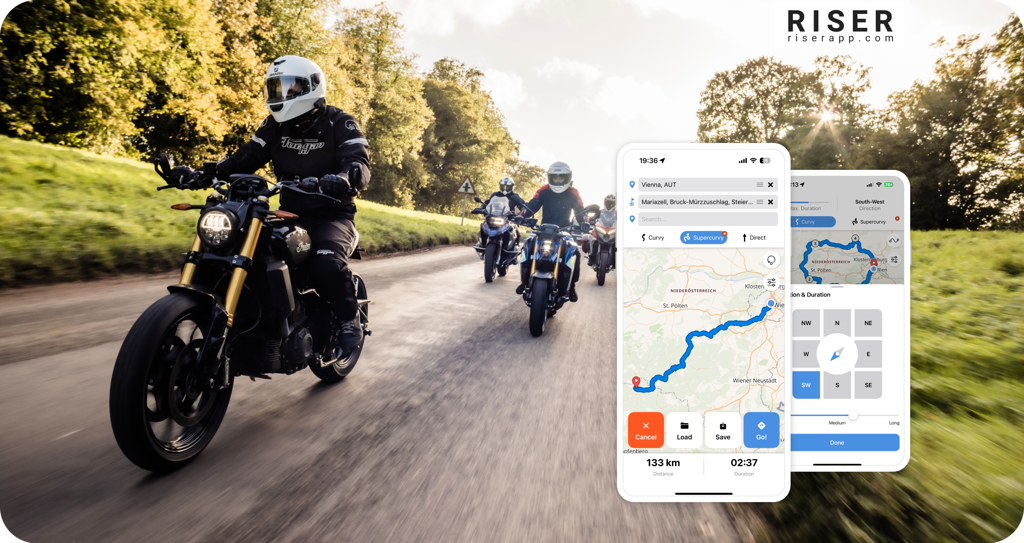
5. Adventure Routing
When starting RISER and entering the Go! screen, you will find the “Adventure Navigator” as a field on the upper side of the screen. That’s the route calculation functionality on RISER.
The RISER Adventure Navigator calculates routes tailored to motorcycling and your personal preferences.
You can have a route suggested from a starting point, including waypoints to your final destination (A-B routing with the options: -Curvy, -Supercurvy, or -Direct; or for a round trip (with the options -Curvy and -Supercurvy). Please note that Supercurvy is only available with a RISER PRO account. To switch between these two modes (A-B or roundtrip), you can find the button in the upper right corner (either a circle or a line connecting two dots).
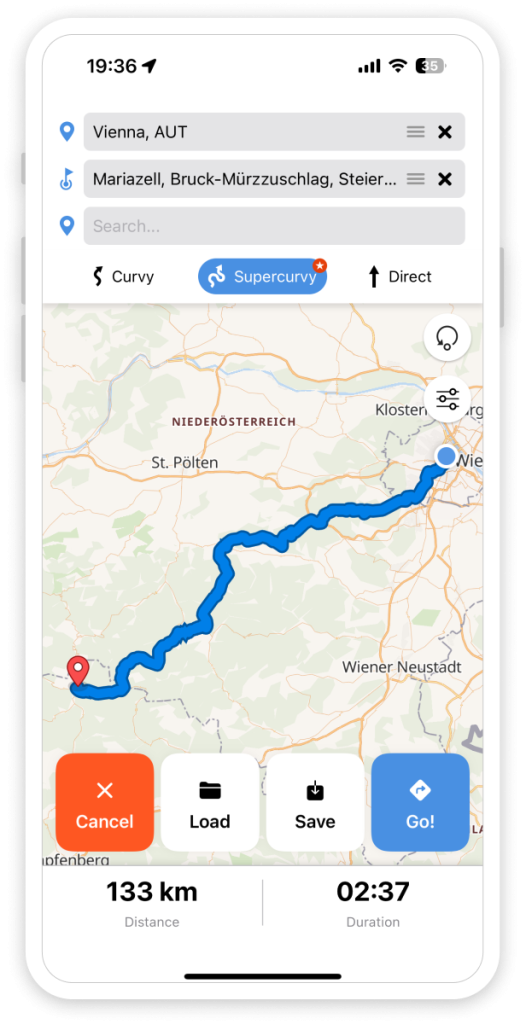

You also have the possibility to save a planned route into your roadbook for a future ride. In both modes, you have the ability to select the option “Avoid motorways”, which can be found via the second button in the upper right corner (three lines with three dots).
In the roundtrip option, if you click on the section where the duration and direction are shown, you can open the Direction and Duration settings. Choose your preferred duration and direction. Click on “Done”, and RISER will provide you with your new roundtrip route. Use the “Go!” button to start the navigation.
6. Tracking and Roadbook
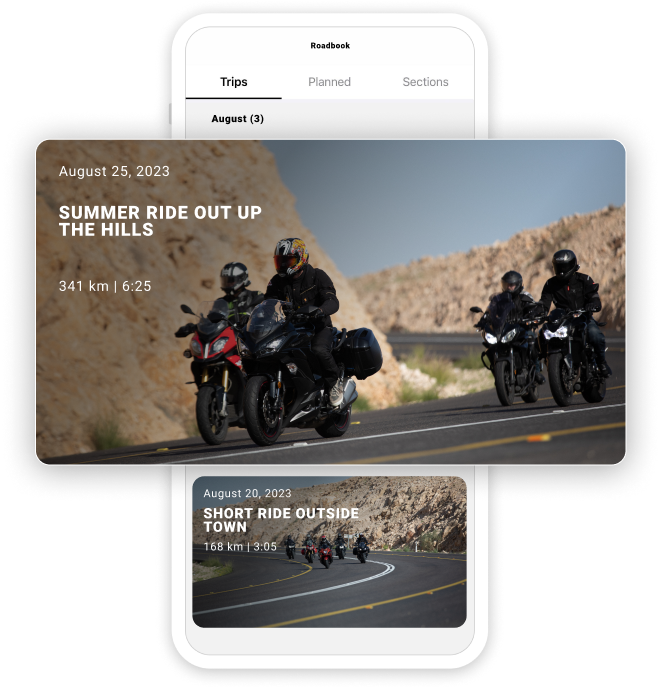
You will find your personal Roadbook in the main menu bar on the bottom of your smartphone’s screen. It is the place on RISER where you can organize, save and manage all your trips. Saved trips will automatically appear here. At the top of your screen you will also find the option to switch between saved “Trips”, “Planned” and “Sections”.
How to track your trip:
With RISER, you can record your trips by tapping the red button on the home screen. RISER will go into auto-pause when you stop (look for the alert with the countdown in the upper part of your screen) and will re-start once you move at a certain speed. Use the menu button at the bottom to open the tracking menu and start a PackRide, Live Tracking, Navigation, or to take a photo. You can also use it to pause, resume, or stop your trip.
When you finish your trip, you can add photos, a bike, a description, users who traveled with you, weather conditions, specify who can see your trip (anyone, friends, or private), hide your top speed, as well as your start and endpoint. Afterward, save the tour in your personal Roadbook. Saved trips can, of course, be edited later on. To access the functionality to edit a saved trip, tap on your saved trip and press the three dots button in the upper right corner.
Every recorded and saved trip can be shared with others either in a message or on social media. Just tap on “Share trip” and choose the channel.
Don’t forget: You can create sections when you record a trip – by defining a section on a trip that you’re about to save, you will have the possibility to share this especially interesting part of your trip in the “Sections” area of RISER and make it available to other users as a special suggestion. In the trip details you can also change the privacy settings of your trip.
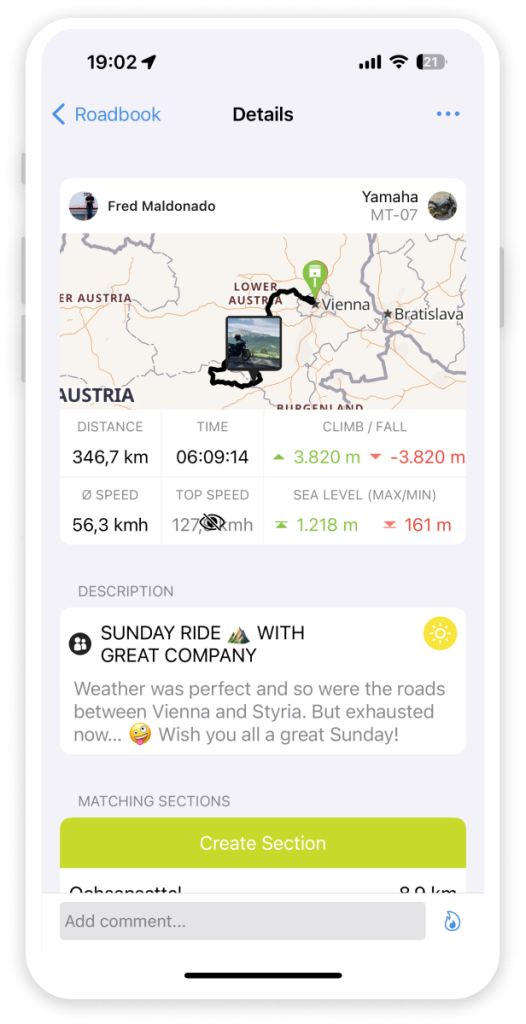
If you want to add someone to your saved trip, use the plus/minus button to change these details.

To use the reWind function, you will need to upgrade to RISER PRO or have an active RISER PRO membership.
7. Getaways
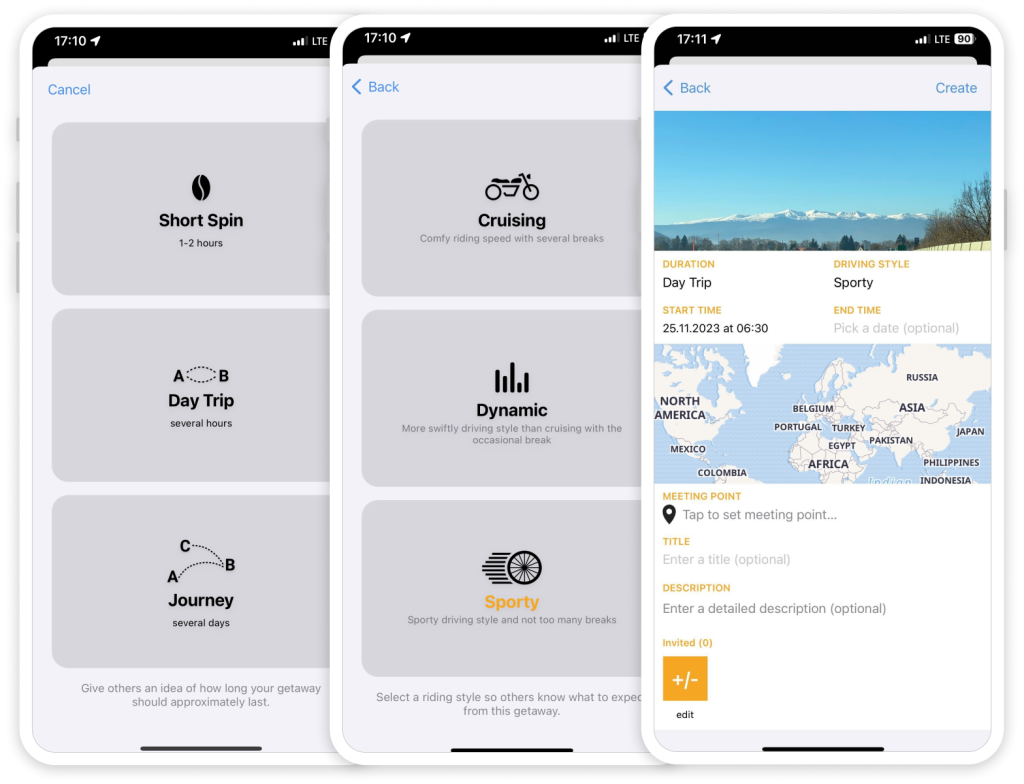
Getaways are an easy way to plan ride outs with friends.
In the main menu bar on RISER, on the bottom tab on “More” and then tab on “Getaways”:
- Choose different types of Getaways
- Specify your driving style
- Edit the details: time, departure point, duration of the ride, other details, pictures etc.
- Invite friends to join
- Discuss further details in the chat of your Getaway directly in the app!
- No more endless discussions with your friends on different channels – do it all in just 3 clicks!
8. Pack Ride
To create a Pack Ride, go to your Go! screen, start a trip and press on the Start Button in the Pack Ride section.
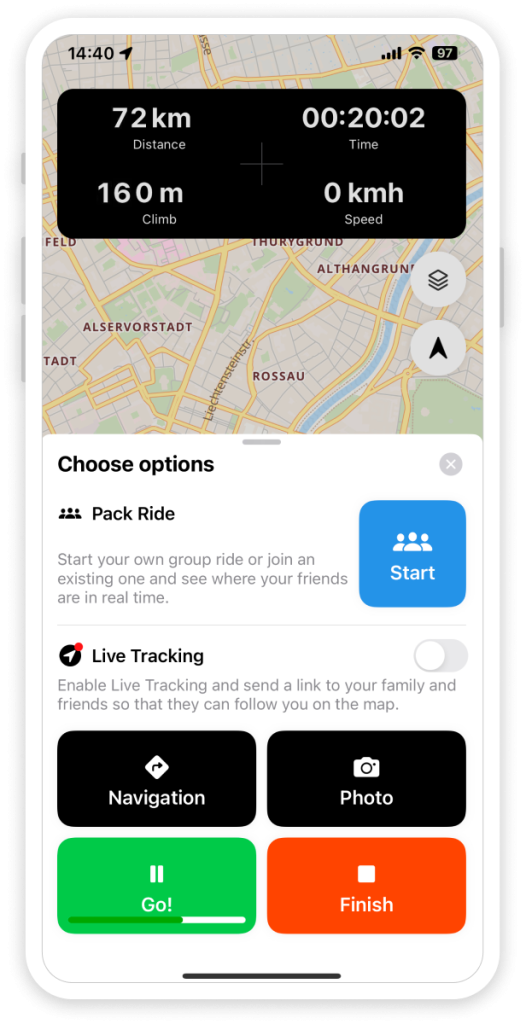
Press the button and create a Pack Ride. RISER riders within a radius of 500m can see and join your Pack. If you only want friends to be able to join in, you can set your Pack Ride to „private“.
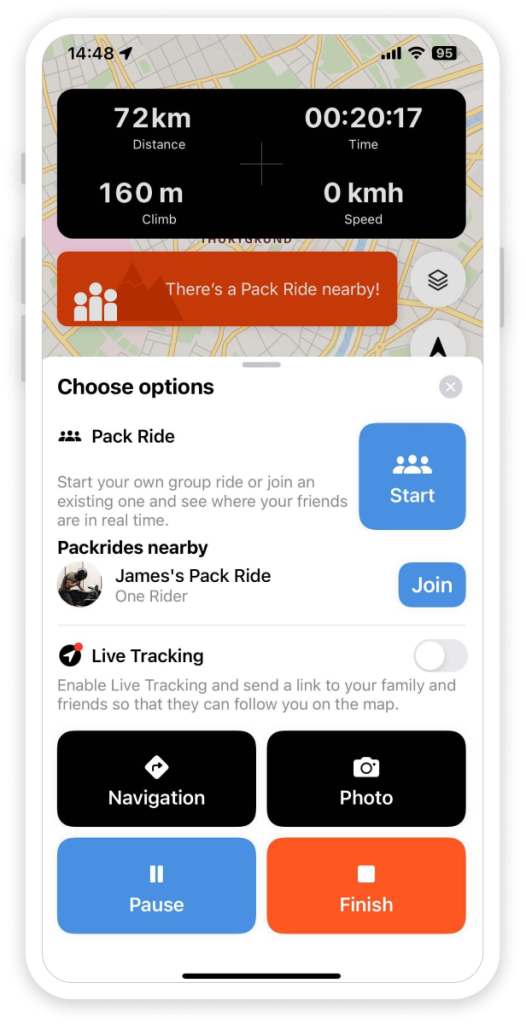
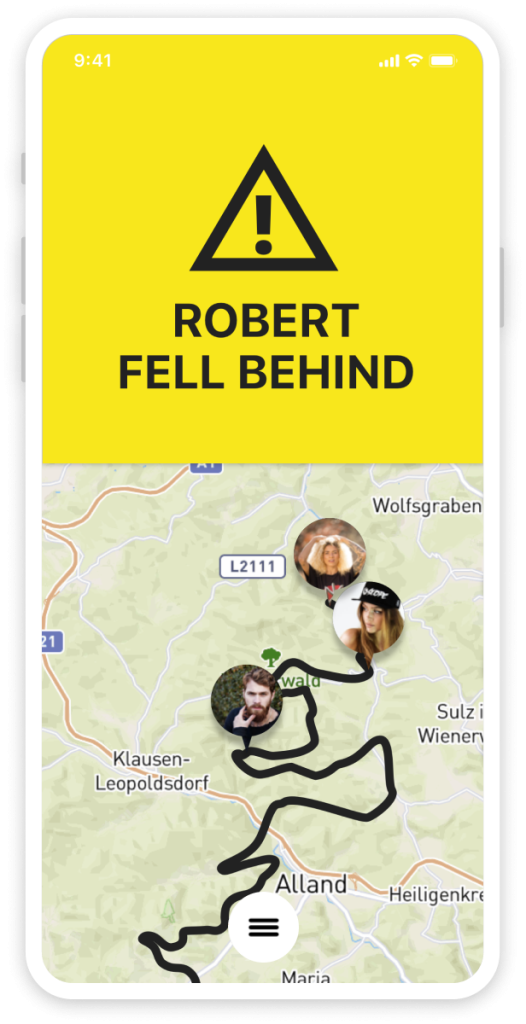
As soon as you ride off, you will see the position of your Pack members on a map. If you or one of your group members falls behind, the whole Pack gets a notification.
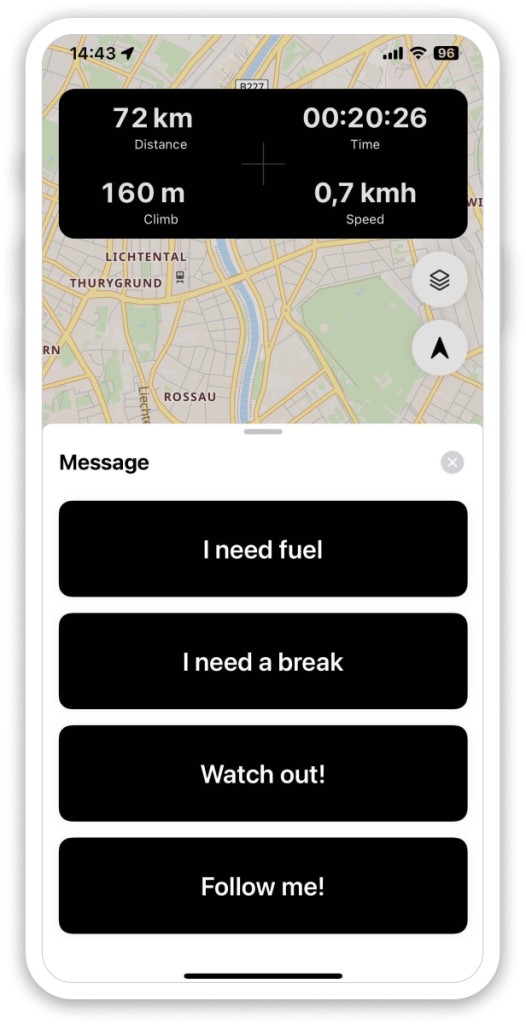
If you need to get fuel, want to take a break or want the others to follow you, you can send a ready-made message to your group members with just two clicks.
Your group ride gets tracked and will be shown in your Roadbook at the end of the trip. The trip also can be viewed by the members of your Pack in their own Roadbook.
9. Live Tracking
On a longer trip, you can easily send a link to your family or friends with your location. So they know exactly how long it will be before your arrival or where the next meeting point could be to join you.
10. Offline Maps
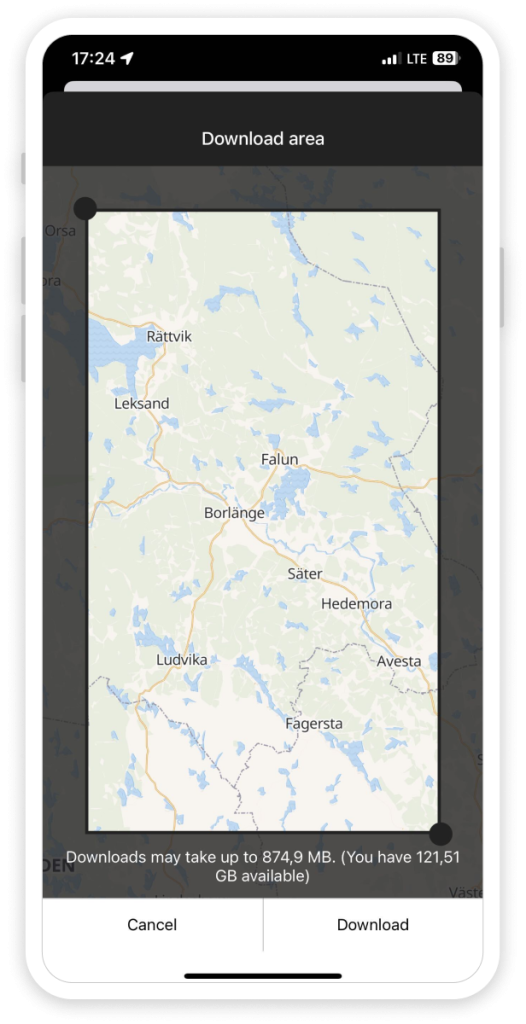
Never lose your orientation with Offline Maps, even if you don’t have a cellular connection. RISER PRO provides the maps you select to you offline, so that you can access it at any time.
11. reWind
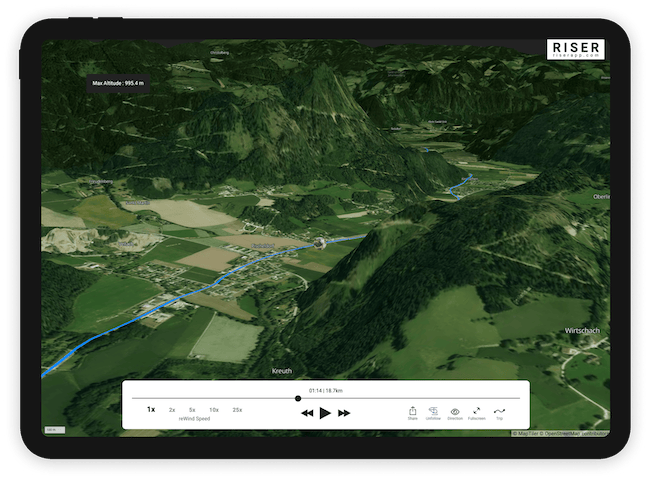
Each trip driven is unique, each route special in its own way. In order to be able to relive your adventure, RISER provides with reWind an interactive map of 3D map material that can be shared via a link. On the dynamic map, the trip is traced, you can zoom in or out at any time or change the perspective. Photos and statistics are also included.